How To Start A Campfire –
We, as humans, have a long history with fire. The ability to control it allowed our ancestors to cook food, stay warm, and to see in the darkness. Today’s societies, and the technology that drives them, are a result of learning to control and modify fires.
Unfortunately, what was once a skill required for survival is now a practice learned for backyard socializing and outdoor recreation. If you have never made a fire before, or your skills are a bit rusty, read on to learn about the best practices when it comes to crafting a fire.
Understanding Fire and What You Are Using It For
Understanding what a fire is will allow you to build one no matter what the environmental conditions are. Simply put, fire is the result of oxygen and heat interacting with fuel. The heat causes changes in the atoms in the fuel material, turning it into gas, which reacts with oxygen.
In campfires, fuels often consist of twigs, branches, or larger pieces of wood. Kindling (used to get fires going) can also be wood or other highly combustible materials. You can also use chemical propellants as campfire fuels.

DOWNLOAD THIS GUIDE IN A FREE PDF E-BOOK FORMAT
Enter your email below to sign up to our newsletter and to download a 42-pages long e-book with step-by-step guides on campfires.
YOUR PRIVACY IS PROTECTED
Heat sources vary from a lighter or match to items that generate sparks. Your skills and interests often dictate what type of heat sources you will carry. You should have more than one heat source with you in case one gets damaged or lost.
Controlling a fire’s access to oxygen is key to starting it and keeping it going. Building a proper campfire (discussed below) will allow you to do just that.
Now that we have covered what fire and its components are, it is time to turn our attention to why you are building it. A fire’s purpose influences what you use to make it.
Your backyard, local green belt, or state park will likely have a previously built enclosure designed for fires. More remote campsites or hiking trails may not have pits or grills, requiring you to make one. Knowing what you need allows you to craft a fire safely.
An emergency fire will likely force you to use surrounding materials as fuel. Those fuels may not be appropriate for a cooking fire, however.
Knowing where you plan to go and what you need a fire for will allow you to take full advantage of local resources as well as bring those that are lacking.
Determine Rules and Regulations
At one time, you could build a fire almost anywhere. With today’s changing environmental conditions, however, regulations have been put into place that may restrict your use of campfires. Ecology is taken into account as much as the weather is.
Residential areas, as well as city/state/national parks, often have regulations that cover the building and use of fires. It is necessary to determine what those regulations are beforehand. As they say, ignorance of the law is no excuse.
You can usually find campfire regulations online. Keep in mind, though, that situations will arise that change existing conditions. Also, do not depend upon posted signs in the area you plan to visit.
Following the rules protects the area, other people, as well as your pocketbook or freedom!
Keep Your Eye On the Seasons
The weather plays a part in building a campfire. Knowing what conditions have prevailed locally can clue you in on possible restrictions. It can also affect the local fuel sources, making them wet or dry.
Building a campfire during the hot, dry summer will require other considerations than making one during the monsoon season. In wet conditions, you may need to consider importing fuel to at least get the fire started.
It might also be necessary to bring all of the fuel sources you will need if the weather has been wet over the season, such as heavy winter conditions.
Building A Proper Campfire – A Step-By-Step Guide
Step One: Gather What You Need
You should carry at least two heat sources. That will include lighter or waterproof matches.
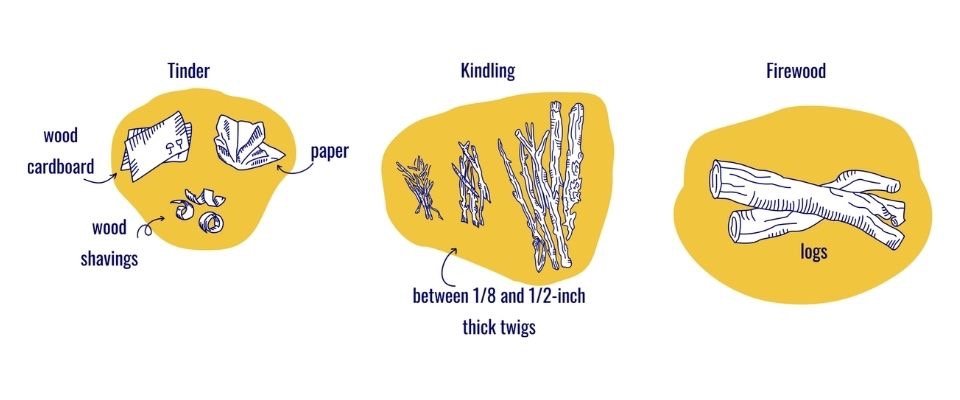
Tinder should consist of wood cardboard, paper, or wood shavings. You can buy products that combust easily as well.
Gather kindling either beforehand or locally on-site. This material should be between 1/8 and 1/2-inch thick twigs.
The last component will be firewood. Dry wood logs ranging from one to five inches thick work well. Use whole or split logs, not branches, for your campfire fuel (it is illegal to cut branches in many areas).
Step Two: Find Or Build A Fire Pit/Ring
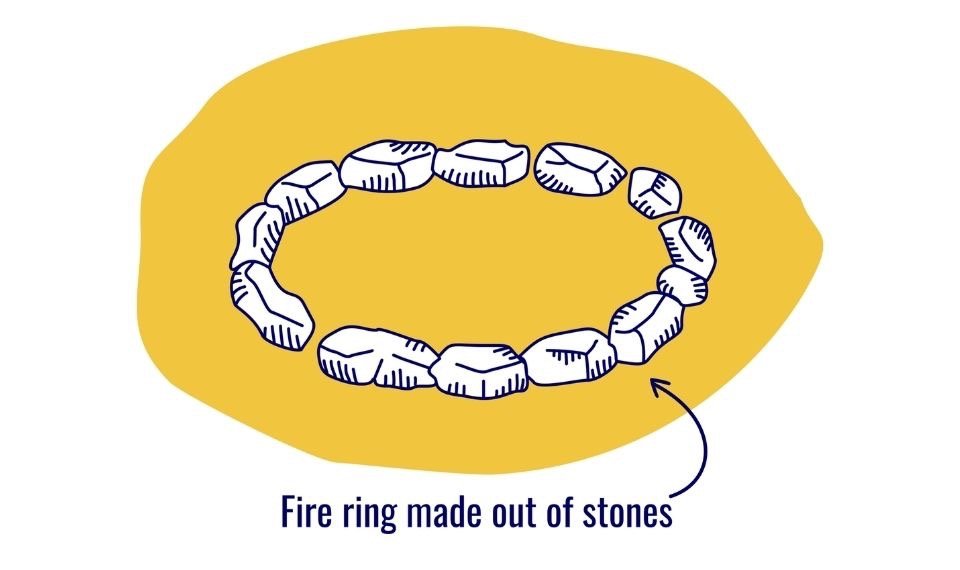
Safety is paramount, and making a campfire outside of a ring is asking for trouble. If the area has designated pits, use them. In areas without these, you will need to build one.
Look around and see if someone has already done the work for you previously before making your own.
Locate an area that does not have low hanging foliage. Find a surface of mineral dirt and rock. You need to clear ground vegetation and other possible fuel for at least eight feet around your pit.
Use gravel, sand, and small rocks in the bottom of the pit. These help keep your fire contained.
Add larger rocks to build a rise off of the ground. This ring helps to prevent heated materials from jumping from the pit.
Step Three: Build The Fire
Place tinder in the center of the pit. Cover about a square foot to provide ample amounts of this fast lighting material.
Now, select the style of fire you want:
Cone
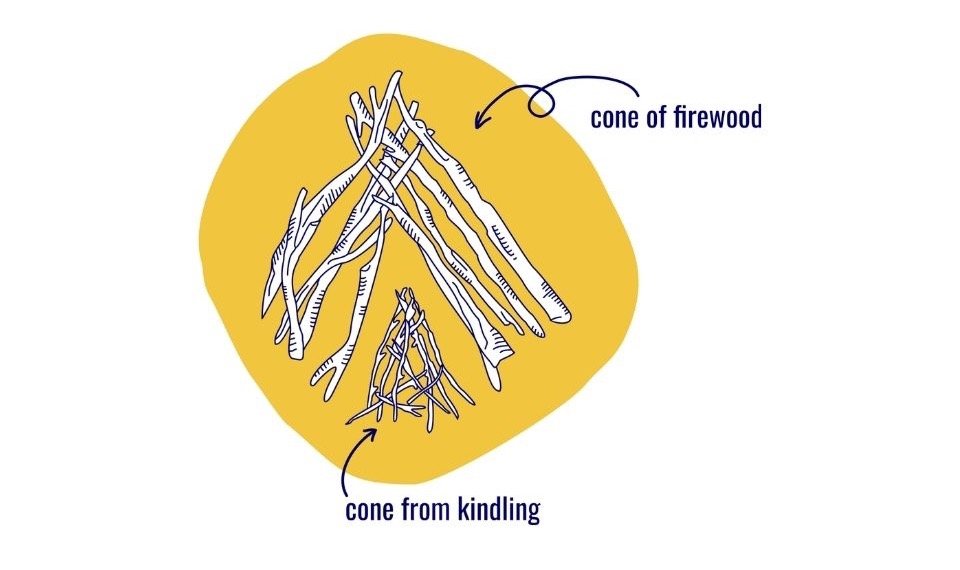
Make a standing cone from kindling, then surround that with a cone of firewood.
Lighting the tinder sparks the kindling, which in turn will catch the firewood. Cones make a good cooking fire.
Cross
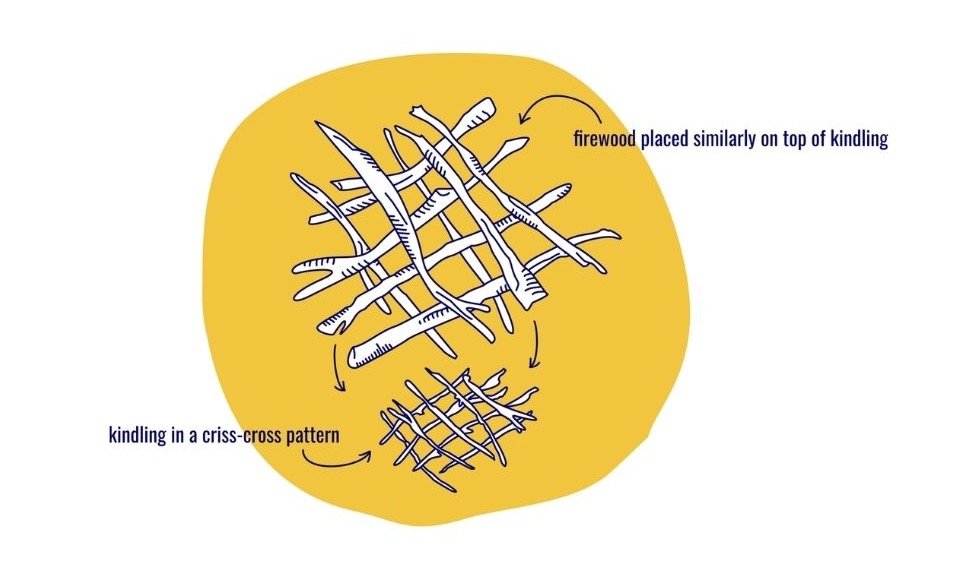
Place kindling in a criss-cross pattern, with the firewood placed similarly on top of that. The fire path will go up from the tinder to the firewood. Cross designs burn longer.
Log Cabin
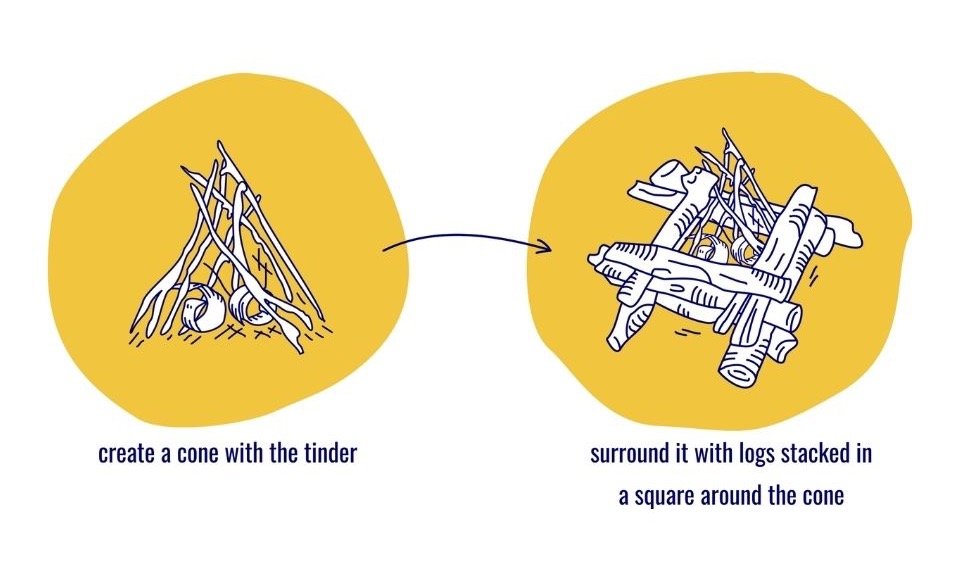
Create a cone with the tinder, then surround it with logs stacked in a square around the cone. Adding small pieces around the interior with each layer adds to the fuel layer. The log cabin is another long-lasting campfire configuration.
Step Four: Light The Fire
Use your heat source to catch the tinder at the bottom of the pit. Sparking the tinder from several locations will produce the best results.
Step Five: Keeping Your Fire Going
You can expect to get approximately one hour of burn for each inch of wood thickness. That can vary with moisture levels and the type of wood burned.
You can extend the burn time of your fire by stacking your wood on top of each other, like lincoln logs. Providing a gap between the stacked logs creates spaces to insert branches. Catch the twigs between the wood, and you will burn the top fuel first, followed by the lower pieces of wood.
Feed the fire as needed, but do not let the flames creep too far above your pit walls.
Step Six: Extinguish Your Fire
Keep water and sand on hand to aid you. Pour water on the coals to put them out. Stir the coal, and repeat until they are cold to the touch.
Step Seven: Break Down The Ring
If you built a ring, try to break it down. Keeping the outdoors the way you found it is the least you can do. If the pit is designated, or built previously by another enthusiast, clean it out and leave it in place.
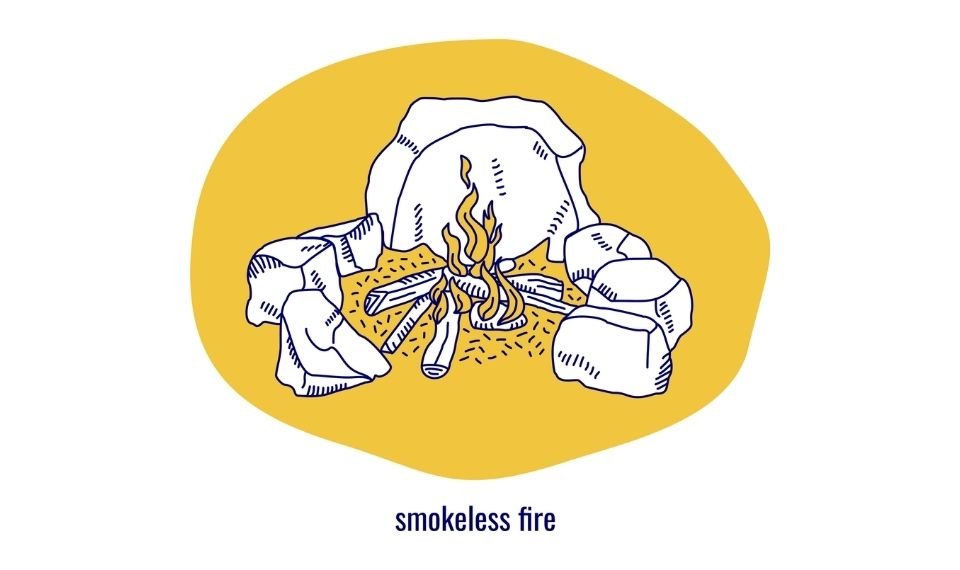
How To Make A Smokeless Campfire
Through the years, people have learned how to create the best fires. These methods generate more heat or burn for extended periods. Learning to build a fire that does not produce smoke is a valuable skill, and it offers advantages over a smokey fire.
Campfire Components
A fire uses heat, fuel, and oxygen. The heat causes the fuel’s atoms to vibrate until they change to a gas form. This gas interacts with oxygen in the air to generate combustion.
Once combustion begins, your fire will need more fuel and oxygen to continue to burn. These also happen to be the two components that are responsible for the smoke from the campfire.
What Is Smoke?
Smoke consists of gases and particles made during the combustion process. These left-overs are a sign of incomplete combustion.
The materials used as a fuel will factor in the amount of smoke from your campfire. Fuel sources that contain moisture, like green or wet woods, will struggle to achieve full combustion. Bark, which produces less heat due to a lower density, will also create more smoke.
Fire pits are notorious for generating lots of smoke. Traditional designs struggle to provide enough oxygen for complete combustion, leaving partially consumed fuel behind in the form of gas and particles. Creating a gap and building up a backstop opposite it in your fire ring will promote air circulation as well as direct the smoke away from you.
Why Hassle With Building A Smokeless Fire?
Building a smokeless fire is not more difficult than building a campfire. You won’t have smoke chasing you around the fire as you get near it. A smokeless fire will not agitate your eyes and nose as much, and the smoke won’t penetrate your clothing.
These fires are better for the environment and your lungs. It produces far fewer particles and gas releases in the air.
A smokeless fire is harder to detect. Less visibility and odor keeps unwanted attention and animals away from your camp.
This type of fire tends to burn for longer. It also consumes fuel efficiently, which means you will use less of it to keep the fire going.
A smokeless fire will not alter the taste of food that you cook on it. That can be an issue, especially when using local materials off of the ground.
What Are The Best Fuels To Use For A Smokeless Fire?
Bringing fuels from home will give you access to clean-burning materials.
Anthracite, also called hard coal, contains the most carbon and has the fewest impurities. A similar fuel called coke also burns cleanly. The problem with these fuels is that you will struggle to burn them in an open campfire pit.
Your best bet is to bring along some kiln-dried firewood. The moisture levels are low, and the wood will burn thoroughly because of this.
You can also find local materials on-site to use.
Dry twigs and small sticks make good kindling. You can strip the bark off of dry wood and use the inner portion of the tree for firewood. Animal dung burns efficiently and can fuel a smokeless fire.
How To Build A Smokeless Campfire – Step-by-Step Guide
Step One: Gather Your Heat and Fuel Sources
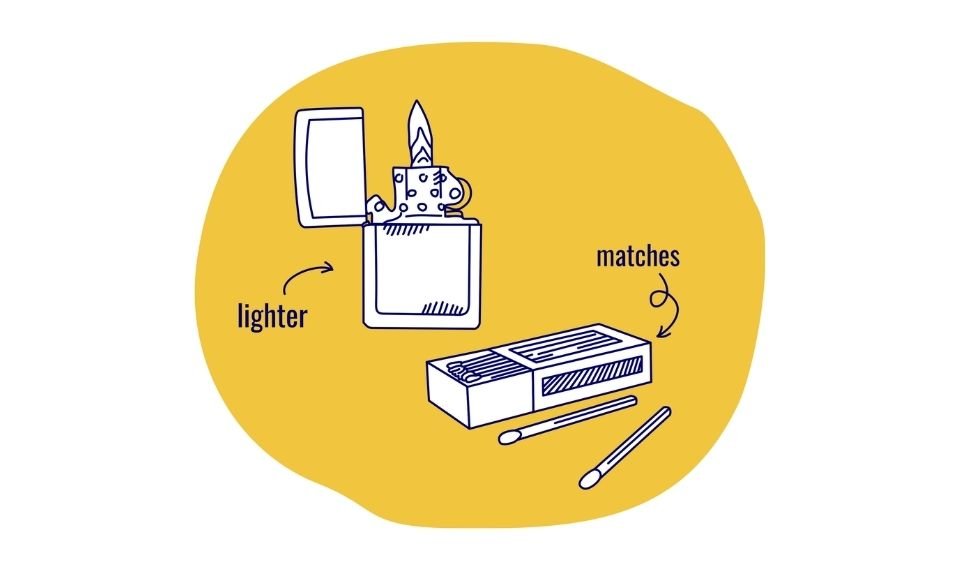
Make sure to have at least two types of fire starters with you. Many outdoor enthusiasts carry a lighter, as well as some fireproof matches.
Also, get your tinder (wood shavings, newspaper, cardboard pieces), kindling (dry twigs and branches), and firewood (Kiln-dried from home or dry interior wood without the bark from the ground).
Step Two: Prepare The Area
Find a place that does not have low-hanging vegetation. Clear away an area of at least eight feet around the location of your fire pit.
Step Three: Build Your Fire Pit
Dig a hole several inches deep into the ground. Place gravel and small rocks on the bottom of the pit, if possible.
Use rocks to form a ring around the hole. Keep a space of about six inches open with no rock wall. This gap will promote air circulation.
Take a large rock and stand it vertical. Keep it opposite your gap. This back wall will attract any smoke that is generated and keep it away from you.
The goal is to have plenty of ventilation for the air. Your fire will pull air through larger gaps, feeding more oxygen to the wood.
Step Four: Build Your Fire
Place about one square foot of tinder in the center of the pit. Create three walls with tinder and then surround that with walls of firewood. Provide plenty of gaps for air and build to a height that does not exceed the fire pit walls by more than a few inches.
Use your heat source to light the tinder in several places. That will get the fire going sooner and make the burn consistent around the pyramid of firewood.
Step Five: Feed The Fire
Keep the fire going by feeding twigs, branches, as well as firewood. The key here is to add fuel to it slowly. Putting too much material on it at one time will generate smoke.
Leave plenty of open space in the fire pit for oxygen to gather and circulate.
The Dakota Fire Pit
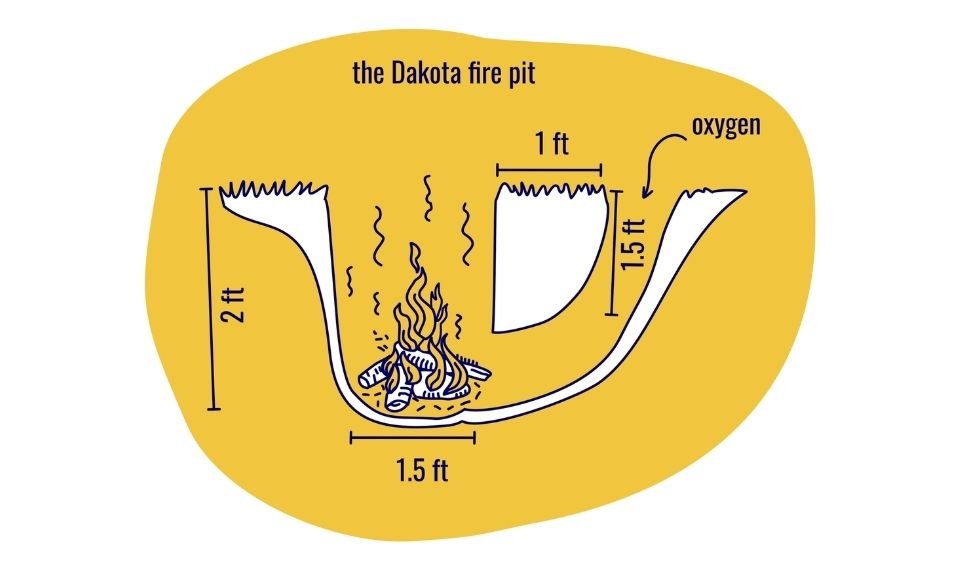
This design uses two holes for the pit instead of one. The first hole is about two feet deep by one and half foot wide, and holds your fuel source.
A second hole about one foot away is connected to it by a tunnel near the base of both. It only needs to run about one and a half feet deep.
The fire hole offers little space for oxygen to enter. The second hole provides that path, and you can also blow oxygen into the base of your fire without risking burning your face.
How To Make Fire In The Rain
One of the main benefits of humans learning to make fires is its ability to comfort us in the elements. From temperature drops at night to snowy days during the winter, fires keep us and our shelters warm.
Learning to make a fire in the rain is a skill that anyone spending time exploring the outdoors should know.
Is There An Advantage To Knowing How To Make Fires In The Rain?
Yes! Anyone who has tried to make a campfire using wet fuels knows how difficult it can be. Most people spending time outdoors will eventually encounter rainy weather.
A proper fire in those conditions will help to dry your clothing and equipment, warm you up, and allow you to eat and drink something hot.
Is Wet Ground and Vegetation The Same As Rain?
Yes, and no. You will still have to deal with wet materials that can affect your ability to create combustion. Also, once the fuel has caught, you may find the moisture content prevents a full burn. It may be harder to keep the fire going, and what does burn could be very smokey.
It will be easier for you, however, if it is not raining. Your clothes and skin will not become soaked, helping you to feel more comfortable as you set up your fire and containment. Ground and vegetation conditions might not be ideal, but at least they are not continuing to deteriorate.
Light rains, or drizzle, will not affect your fuels as much. Water penetration should be minimal, allowing you to catch and burn wood with a higher success rate.
Constant rains will penetrate the bark, soaking the inner wood fibers. Depending upon the intensity, heavier rains could also flood your fire pit and extinguish a campfire.
Prepare Ahead Of Time
Before discussing how to build a fire in the rain, let us look into things that you can do to make it easier when that time comes. First, look at the weather conditions for the location you are visiting.
If it has been raining, you can help yourself by packing some dry tinder, kindling, and perhaps firewood if the rains have been severe. You can also bring some fire starters (discussed below). These pieces of equipment can help with a more intense heat source to catch damp materials.
Also, look at the future forecast. Knowing that rain is expected will allow you to collect extra firewood ahead of time once you reach the site. You can also protect your fuel so that it does not get wet once the rains arrive.
It is worthwhile to take these precautions, even if rain is not in the forecast. You will thank yourself once an unexpected storm sneaks up on you.
Fire Starters
Also called fire helpers, these materials combine the roles of heat and fuel. Once you light them, the fire starters continue to present a consistent flame that will last for a long time. That flame will usually provide more heat (often with chemicals added).
You can buy fire starters commercially, or you can make your own. From dryer lint or string covered in wax to cotton balls smeared with vaseline, the fire helper is placed into the campfire once it is activated.
These items speed up the fire starting process under all conditions. They stand out when making a fire in the rain since they provide a more intense heat source with longer durations than a lighter or match.
How To Build A Fire In The Rain – Step-by-Step Guide
Step One: Find Shelter
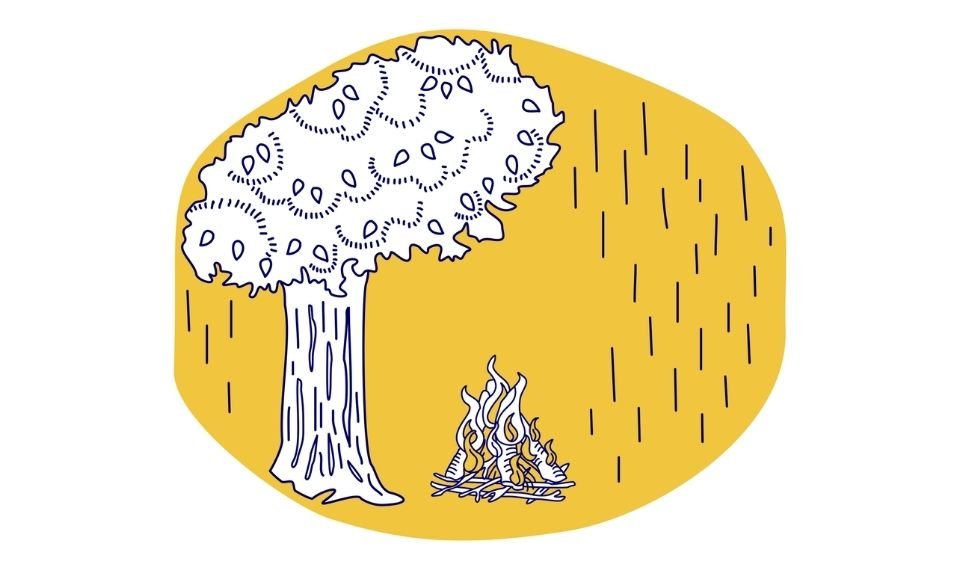
You will find it easier to make a fire if the rain is not soaking you or the campfire. Setting up a tent or lean-to reduces rains and may block the wind that often accompanies storms.
In a pinch, you can use tree limbs or even a large rock as a partial block.
Step Two: Prepare Your Pit
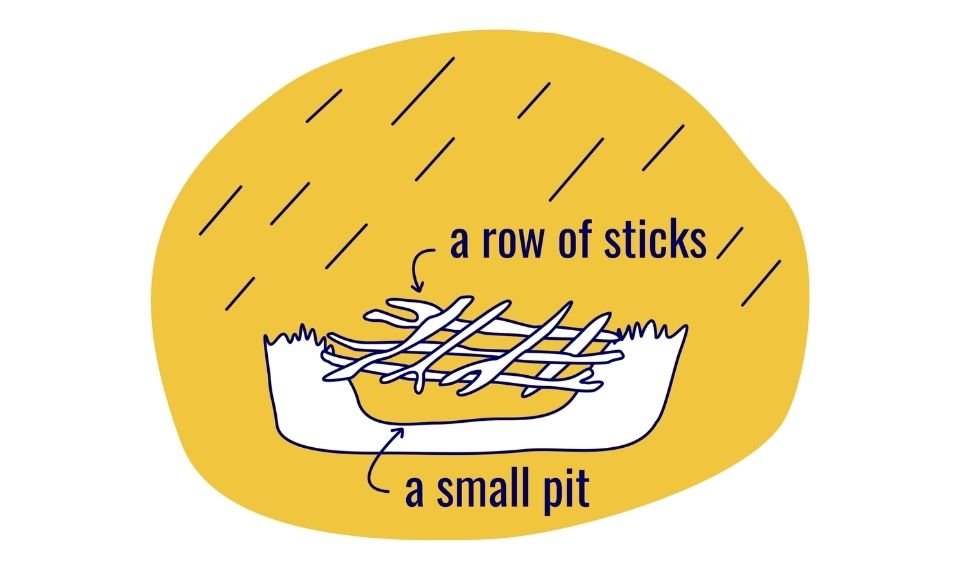
Wet ground, especially if it is heavily soaked, will not catch fire. You can still clear away potential fuels and build a ring, however.
Digging a pit may be difficult in the mud, and heavy rains can fill it with water.
Next, make sure to place a row of sticks on the ground. This raft creates a barrier between your campfire and the wet ground. Eventually, these sticks will fuel the fire as hot embers gather.
Step Three: Build The Fire
Place a layer of tinder on the raft. Cover about one square foot within the pit. If some tinder covers the ground around the raft, that is okay.
Now, you can place tinder in a cone shape, with the point stands towards the sky. That helps to keep the majority of these small twigs and branches away from the wet ground.
Step Four: Light The Fire
Before placing pieces of wood, you need to get your fire going. Use fire starters to aid catching the tinder and kindling. Feed more twigs and small branches, slowly adding items with a greater diameter.
Slowly building a fire helps to keep it going in wet conditions. Larger pieces of wood hold more moisture and can go out if added too soon.
Step Five: Dry Fuels
If you are using gathered materials that are wet, you will need to place them near the fire to help remove moisture. Wet bark is not an issue, but wood soaked into the inner fibers will not combust fully without drying a bit.
You can even place pieces on the sides or above the flames. That will dry them more quickly and make it easier to feed them.
Step Six: Keep It Going
To maintain a fire in wet conditions, keep feed materials slowly into the flames and embers. Keep fuel sources smaller than usual to avoid wood that will not catch.
Step Seven: Clean Up After
Once you are done, make sure that the embers are out. While rain can help, you should pour water as needed and stir them until they are cold to the touch. Break down any rocks used to make your fire ring.
How Hot Is A Campfire?
Have you ever stood next to a campfire and felt the heat, even when you were more than a foot away? You might be surprised to find out just how hot a campfire can get.
What Temperature Does Wood Burn?
Wood needs to dry out before the atoms can heat to the point of combustion. At 212-degrees Fahrenheit (about 100-degrees Celsius), the water in the wood fibers begins to boil away.
From 212 to 450-degrees Fahrenheit (100-232 Celsius), gases build within the wood. That is considered the first stage of combustion. At 540-degrees (282 °C), the second stage of combustion begins with primary gas ignition.
Above 900-degrees (482 °C), much of the potential energy from the wood escapes. Secondary gases that require more heat begin to ignite as the fire reaches over 1,100-degrees Fahrenheit (593 °C).
700-degrees (371 °C) is considered the temperature that wood ignites, as that marks the point that wood in an oven ignites instantly.
Does A Campfire Burn At Different Temperatures?
The temperature of a campfire can vary, depending upon its size and location in the fire. Average campfire temperatures reach about 930-degrees (499 °C), while large bonfires can exceed 2,012-degrees Fahrenheit (1100 °C).
Usually, the hottest part of a campfire will be a point above the embers and below the burning logs.
How Do You Put Out A Campfire?
There is plenty of evidence showing how people evolved their understanding of fire, using it for a variety of tasks. It was not until the latter half of the 20th century, however, that people began to focus on what do with a fire afterward.
How Long Can A Campfire Burn?
Many factors will dictate how long wood can burn for, but the 1/2-inch rule is popular with many outdoor enthusiasts. That rule states that a log will burn approximately one hour for every 1/2-inch thickness.
For example, a four-inch-thick piece of wood can burn up to eight hours before being fully consumed.
Less conservative estimates are closer to an hour for every inch of thickness. In either case, this accounts for the wood and not the embers left at the bottom of the pit.
How Long Will Embers Last?
You might be surprised to discover that embers can generate heat for up to 12 hours after combustion stops. That is why you can quickly restart a campfire the following morning. It also creates a danger for you and the surrounding area.
The American Burn Association estimates embers cause 70-percent of campfire burns, not the flames. People create nearly 85-percent of wildfires, including those started by unattended campfires.
These two statistics alone highlight the need for extinguishing a campfire properly.
When Is The Best Time To Put A Campfire Out?
Old television shows displayed cowboys pouring coffee on a campfire before hurridly riding off to catch the outlaws. Today, campers and hikers are more conscientious about extinguishing a fire before leaving the area.
When camping, it is a safe practice to put a fire out before retiring to bed. That prevents an unattended fire from jumping the containment and catching vegetation. It also limits the chance of a flying ember from starting a fire outside of the pit.
If you plan to use a campfire for cooking, leave plenty of time after to extinguish the fire before breaking down the rest of your camp.
Following these rules will allow you to check the pit one more time to make sure a hot spot that you missed has not flared up to pose a danger. Avoid putting out a fire and leaving immediately after unless you have an emergency.
What Should You Use To Extinguish A Campfire?
Water. It is the best thing to use, hands down. Water cuts off the oxygen supply and reduces the heat built up in wood and embers. Using water also allows you to flood the fire pit floor.
If water is not available, use dirt or sand. Stir this material into the embers until they are cool to the touch. That will take longer, and note that these materials may not eliminate oxygen or dissipate hot spots on the fire pit floor.
Avoid Flashing A Campfire
One mistake that many novices make is using too much water on burning wood or embers. Pouring larger quantities of water on fire can cause the water to steam and explode.
That could send hot wood or embers flying out of the pit, hitting you, your gear, or the vegetation in the surrounding area.
How To Put Out A Campfire – Step-by-Step Guide
Step One: Let The Fire Burn Down
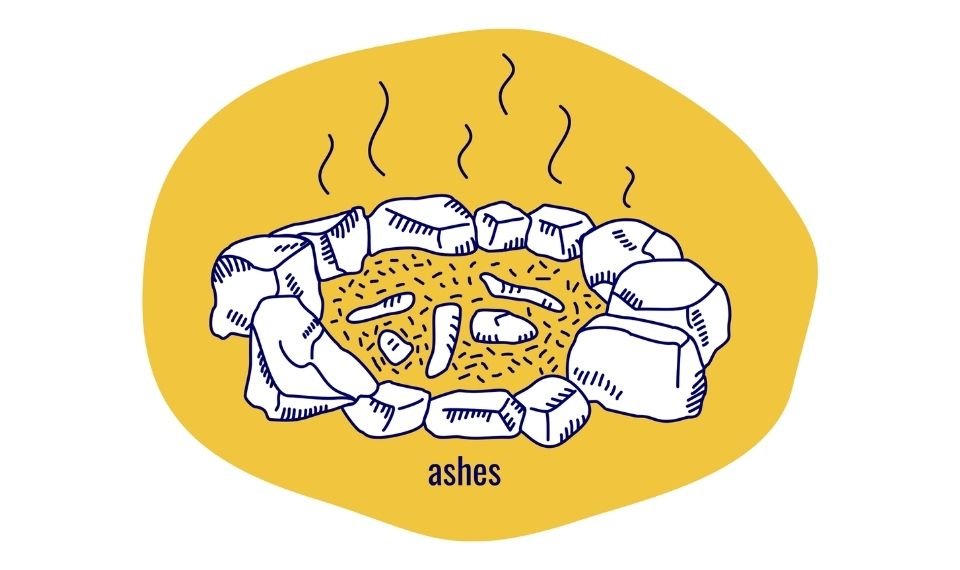
If possible, let the wood burn down completely. Use a stick to stir the embers. It will break them apart and force them to burn out faster. Stirring also mixes the ashes, which can help to cool down materials that are still generating heat.
Reducing the fire to ashes is ideal.
Step Two: Sprinkle Water
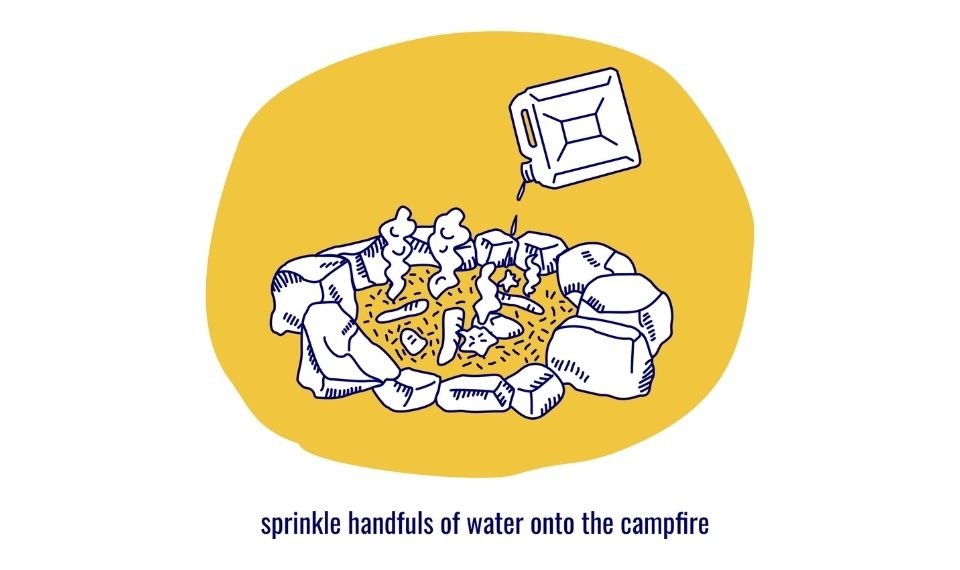
Once the coals stop glowing and ash is all that remains, begin to sprinkle handfuls of water onto the campfire.
These smaller amounts should not flash but will start cooling the campfire ashes and coals. Hissing will fade as more water lands on the pit.
Step Three: Splash Handfuls Of Water
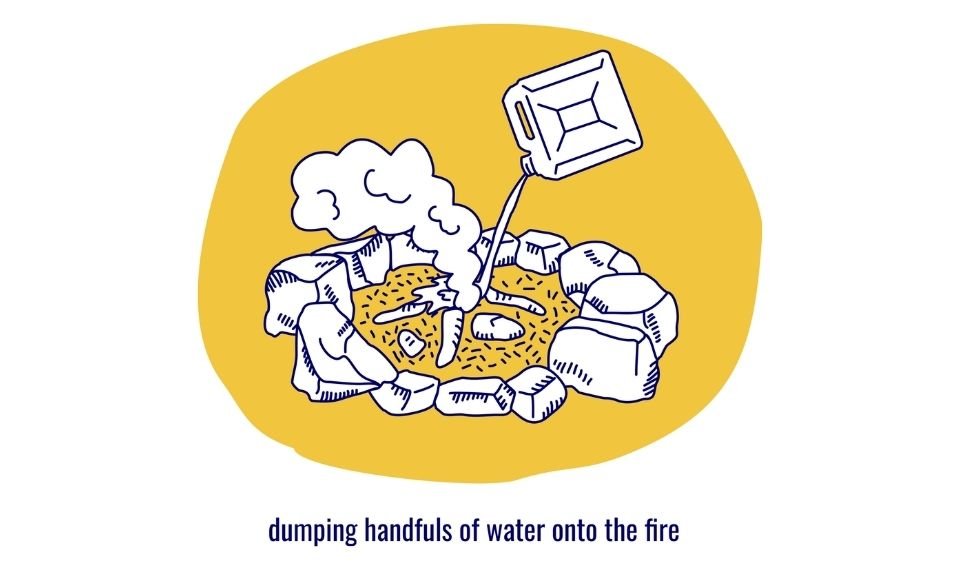
When the glow fades and the crackling or hissing stops, start dumping handfuls of water onto the fire. It will not flash at this point, and the extra water will suffocate larger embers and cool them.
Step Four: Pour Water And Stir
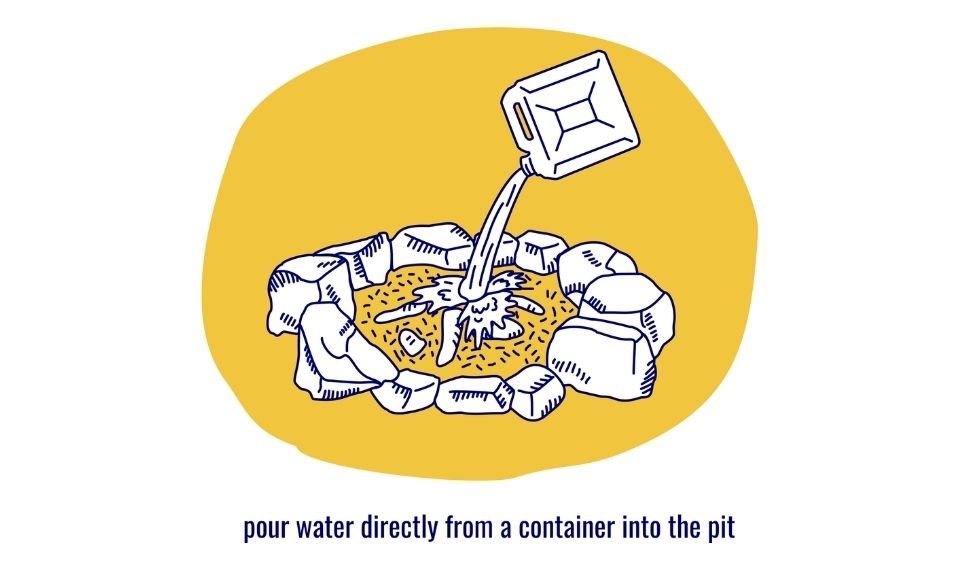
Now, pour water directly from a container into the pit. That will drown the remaining embers. Use a stick to stir the debris, mixing the water with the ash and embers.
Stirring at this stage exposes hot spots hidden under the top layer of debris. It also dissipates the heat rising from the fire pit floor.
Step Five: Wait And Check Again
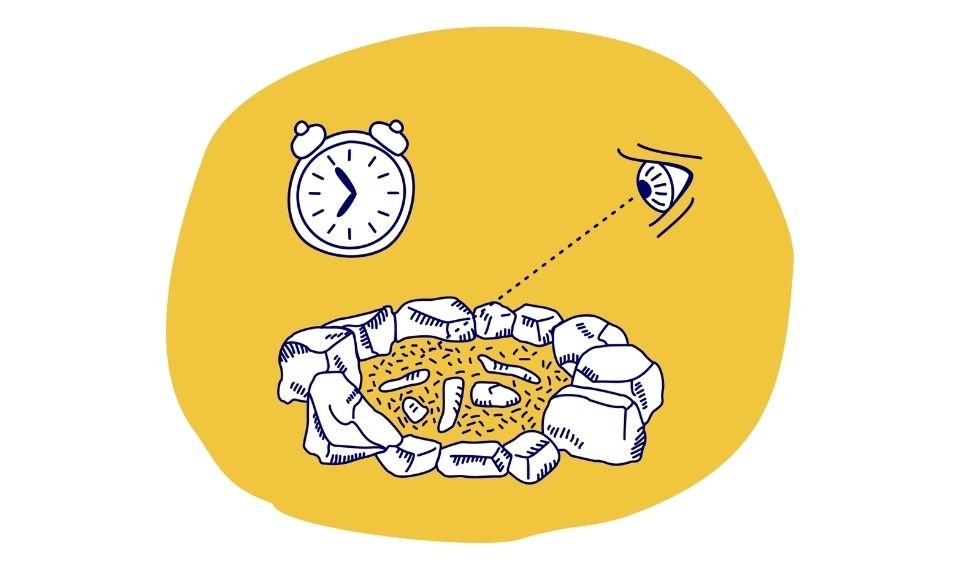
Many outdoor enthusiasts stop at step four. That is a mistake that could result in a flare-up. You want to wait until the next morning and check the pit for any hot spots.
If you cook breakfast, wait until late morning before you clean up and leave.
If everything is still out, you can break down the fire pit and leave. If you find a hot spot, repeat steps two through four.
Step Six: Return The Site To Its Former State
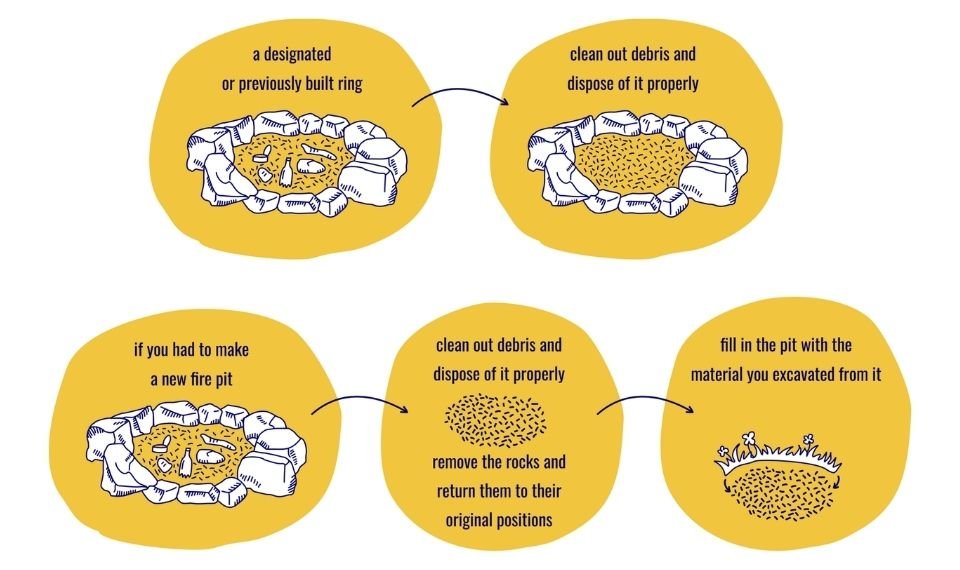
If you used a designated or previously built ring, take the time to clean out debris and dispose of it properly. That leaves it ready for the next person to use.
If you had to make a fire pit, make sure to clean out the debris and dispose of it. Remove the rocks and return them to their original positions.
Finally, fill in the pit with the material you excavated from it.
Using Dirt Or Sand Instead Of Water
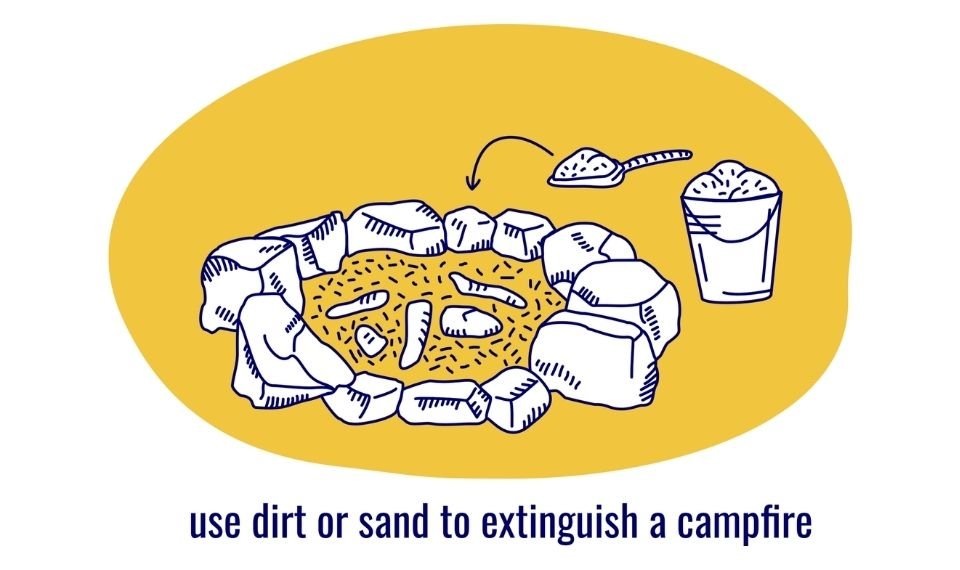
The process will be the same for using dirt or sand to extinguish a campfire. Clean out any leaves or needles that could combust.
Do not bury the fire. Instead, slowly mix in dirt and sand with the embers. It should slowly begin to break them down and cool the fire pit floor. Use a shovel to disturb the top layer of the flooring to make sure that no hot spots are hiding directly underneath.
Return the site to its previous condition once you verify that the fire is out.
Why Does Campfire Smoke Follow You?
Enjoying the warmth from a campfire on a cold night is a fantastic experience. Being hit in the face with smoke from the fire is something altogether different.
You find yourself having to move to get a breath of fresh air.
Then it hits you again, and you move. Soon, you find yourself making circles around the fire, or you stand behind someone else (and still get hit in the face with rolling smoke).
Is The Smoke Following You?
No, not really. What it is doing, however, is reacting to your movement and the environment. Smoke consists of gas and particles suspended in the air. When you move, the air (and smoke) rushes in to fill the space you once occupied. That is one reason.
Another reason is the air current. Smoke will move in the direction that the wind is blowing. When you stand near the fire, your body could be blocking that flow.
If you are blocking the current, the smoke will tend to move towards the area where there is less disturbance, which happens to be right in your face.
The wind is not the only issue at play here, though. Heat and smoke rise together from the campfire. Surrounding air, which is cool, will move down towards the base of the fire.
When you stand by the fire, your body interrupts the flow of cold air, creating an area the smoke will move towards to fill it.
While it might be fun to think that smoke has a mind of its own, we will have to settle on natural laws for an explanation!
hello, we are Evelin and Ferenc,
Join the Overlanding Adventure Now!
Get expert advice, tales, and gear recs to elevate your adventures. No spam, just top-notch information. Click the button and start your journey today!
YOUR PRIVACY IS PROTECTED


